I mentioned yesterday that I received a care package from the wonderful Zootsuitmama. I won her kitchen giveaway, and she sent me a whole box of goodies!
I love all of it- and I will use them all, as well. I'm a big tea/coffee drinker and that yellow tea cup will be perfect. I didn't have any oil & vinegar cruets (don't know why, either, as that's how I dress my salads) but you can bet I'll put those Pyrex ones to good use right away. The turquiose Melmac creamer & sugar match a luncheon set I already have, but I didn't have those pieces. And the pink tea towel is so cute, I can think of a number of places to put it; I just have to decide (the bathroom, the kitchen, the guest room?).
But my favorite piece of all is the tablecloth. I don't know how you knew this Deb, but I collect these printed tablecloths. Lately, I've been forcing myself to stop buying them because most are too small for my kitchen table- but not this one! And it's the most lovely pattern as well- easily one of my favorites of all that I have. And I have a bunch:
So thank you dear! And go check out her blog !
Friday, April 30, 2010
Thursday, April 29, 2010
Thrifted Thursday- the vintage gods must be smiling on me
Boy I sure hope this crazy luck of mine holds on for a little while!
Today was our community's semi-annual rummage sale. I look forward to this like my kids look forward to Christmas. I've had some good luck there in the past, but other times have been a total washout. I was hoping today would be a good day, and I was not dissapointed!
My community is ideal for a vintage-minded bargain hunter like myself. It's a lot of older folks living in older houses, and many of them are at the point where they're downsizing. So that means some great yard sales, rummage sales & flea markets! I also live in a town with at least a dozen antique stores, so I know there are dealers out there doing the same thing I am. So I never know if I'm going to get good stuff or just left-overs.
Today was a great day- I bought a bunch of vintage dresses & playsuits for my 2-yr old daughter and some things for myself. My 5-yr old son, who is shaping up into a vintage lover like me, found some classic children's books for himself.
First, sweet vintage dresses- $1 each- the largest one (on the right) is a size 6- hopefully my daughter will want to wear it when she's that age, because it is adorable:
I just want to frame this one, it's so awesome!
Today was our community's semi-annual rummage sale. I look forward to this like my kids look forward to Christmas. I've had some good luck there in the past, but other times have been a total washout. I was hoping today would be a good day, and I was not dissapointed!
My community is ideal for a vintage-minded bargain hunter like myself. It's a lot of older folks living in older houses, and many of them are at the point where they're downsizing. So that means some great yard sales, rummage sales & flea markets! I also live in a town with at least a dozen antique stores, so I know there are dealers out there doing the same thing I am. So I never know if I'm going to get good stuff or just left-overs.
Today was a great day- I bought a bunch of vintage dresses & playsuits for my 2-yr old daughter and some things for myself. My 5-yr old son, who is shaping up into a vintage lover like me, found some classic children's books for himself.
First, sweet vintage dresses- $1 each- the largest one (on the right) is a size 6- hopefully my daughter will want to wear it when she's that age, because it is adorable:
The blue one in the middle is a feedsack dress and the red check one is a cotton blouse. The 60s mod print is a playsuit- I remember my mother having an apron in this print when I was little.
I think I paid $2 total for all of these.
Left & center are a red polka-dot top and shorts, right is a hand-embroidered smock, which has never been worn.
For myself I found a BH&G Gardening Book from 1955 ($1) and a stack of 1940s-50s Christmas cards for 50 cents. Those of you that get Xmas cards from me are in for a treat this year!
I just want to frame this one, it's so awesome!
inside:
I also got this great pretzel tin, which will be good to strore my sewing notions:
That was a bit of a splurge at $2, but I think it was a good haul overall, don't you?
My total for all that was $9!!!
And then to top it off, when I got home I found a package from the lovely Zootsuitmama on my doorstep- Man, what a great day!
Wednesday, April 28, 2010
Chillin'
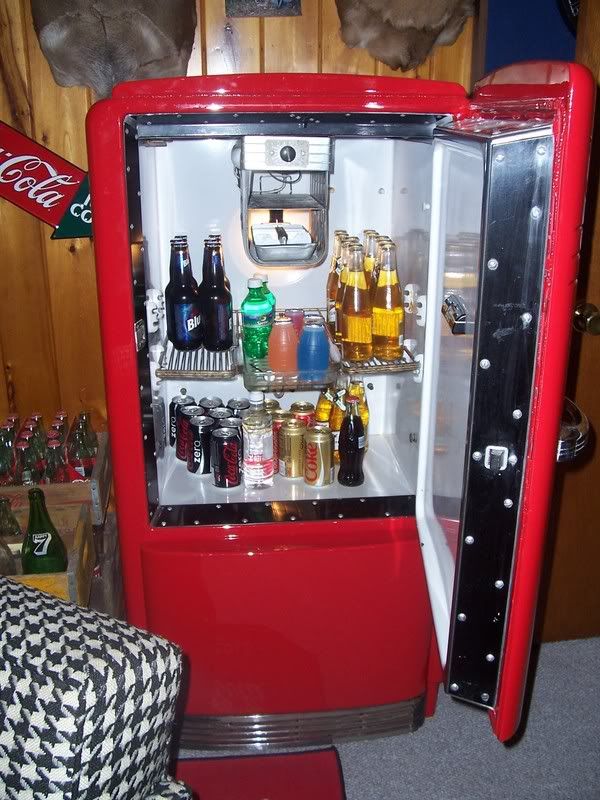
A while back the fabulous MissCherryBubbles posted about her red refrigerator. It reminded me to take a moment to show you all ours and tell the story behind it.
It's another one of those things that we got from my husband's father; my husband remembers it being in his grandfather's house before that. Remembering my father-in-law, I'm sure he kept it full of fishing bait and ginger ale in the basement.
It's not very large- I'd say it's about 8 cu.ft., but that was the standard size back in the 1930s & 40s. It has a tiny freezer compartment in the top- just big enough for about 3 ice cube trays. It was originally white and is still white on the inside. It has its original wire and glass shelves, and I have two original metal ice cube trays- the kind with a lever that is supposed to pop the cubes out.
I haven't been able to find the exact model #, but I believe it dates from about 1940. It's a Hotpoint.
We had it painted Coca-Cola red at an auto-body shop, and had the compressor and thermostat restored by a friend that does HVAC. It's been humming along for over two years now.
And the cool thing about vintage fridges is that they're often more energy efficient than new ones. How can that be? Well, new fridges have a lot of bells and whistles that suck electricity. Things like being "frost free" require extra heating elements in the casing of the fridge, and add an ice maker, etc... you get the idea. Plus all that extra cubic feet- this little fridge probably uses half the electric of a new one.
Tuesday, April 27, 2010
Trash-picked Tuesday: a little something and the promise of many more
This is probably the smallest item I've ever trash-picked. It's a little ceramic soap dish, about 2"x3". I pulled it out of a trash pile back in the woods by our cabin. I saw the edge of it in the dirt and dug it up, expecting it to be just a shard of something long since broken. But to my surprise, it was completely intact and cleaned up beautifully. I would put the date of it no later than the 1930s; maybe as far back as the 1880s. I keep it on my dresser to catch things like buttons and pins.
It's been getting harder to think of items for Trash-picked Tuesday lately (after all, I didn't furnish my whole house with garbage, although my husband might disagree!) so I was delighted to see the following sight from my upstairs window today:
The neighbor's house across the street has been empty since the man who lived there died last fall. He was the original owner, and as far as I could tell, never threw anything out. I know there has got to be tons of stuff in there; but who knows if there is anything worth salvaging. Well, we will definitely find out- as soon as they fill that baby up, you can bet that I will be diving in!
Happy picking, everyone!
Monday, April 26, 2010
Our treasure hauler
Michael over at Cul-de-sac Shack posted a picture of his "treasure hauler"- a 1992 F-150- so I thought I'd represent for GM (because we all know what F-O-R-D stands for) ;).
Our treasure hauler is a 1990 Chevy 1500. It's got 275,000 miles on it and is probably the most reliable of our three vehicles. (The other two would be a 2000 Buick LeSabre and a 1997 VW Jetta.) It's been with my husband longer than I have! And I've learned to never get between a man and his truck!
I also want to point out that two-tone paint schemes are not just for 50s cars- many pickups sport them even today. The blue & silver paint on our truck is still pretty nice, but some spots have been re-done. It helps that my husband went to school for auto body repair.
I've hauled the black & white houndstooth chair I featured in the first Trash-picked Tuesday in it; thankfully I was driving it that day I saw the chair by the curb and not the Jetta! Having a cap on the back makes it extra nice- bad weather is never an issue.
It has also hauled my 1959 Seeburg jukebox and a 1970s pinball machine we picked up out in York, PA, so it can carry some precious (at least to me) cargo. And it has an extended cab to haul the dearest cargo of all- our two kids- because they inevitably get drageed along on all my treasure hunts!
Thursday, April 22, 2010
Thrifted Earth Day - the original way to recycle!
We don't often think of the 1940s & 50s when we think of recycling. After all, back then, if it was new it was always better!
But what about all those ice cold bottles of pop folks used to enjoy on their front stoop? Sure, some of them got kicked to the curb, but most were returned for deposit, washed and re-filled.
I don't know what it is about these old bottles, but I can't stop collecting them. I have at least 6 dozen, with the usuals (Coke, Pepsi) and a lot of unusual ones, like the pristine set of unused Nehi bottles I bought at a thrift store for $15. That's a little more than I usually pay, but they came with the cool Frank's carrier, so I bit.
I remember that was all we drank as kids- Frank's Orange, Grape, and of course, the legendary Black Cherry Wishniak. I guess Frank's is still around, but I haven't seen it for a while. I remember taking the bottles back to the beer distributor too, way before anyone "recycled." Does that make me old?
But what about all those ice cold bottles of pop folks used to enjoy on their front stoop? Sure, some of them got kicked to the curb, but most were returned for deposit, washed and re-filled.
I remember that was all we drank as kids- Frank's Orange, Grape, and of course, the legendary Black Cherry Wishniak. I guess Frank's is still around, but I haven't seen it for a while. I remember taking the bottles back to the beer distributor too, way before anyone "recycled." Does that make me old?
Wednesday, April 21, 2010
Springtime at ChezQT: Bluebird on my shoulder
I'm a terrible photographer. Problem is, I like to take pictures. Artsy-fartsy pictures. So if you'll indulge me, here are a few snaps of springtime in my yard. (And I also like corny song references- that's my inner music geek coming out.)
I know this doesn't look like much, but do you see what I see?
Right in the center of the picture is a bluebird- you can barely make it out, but look for the blue (duh).
My neighbor has counted four pairs of bluebirds around his yard this year. I've noticed that we have many more around than ever. And that's pretty neat. I hope they're making a comeback- keep your eyes open and see if you see any around where you are!
Tuesday, April 20, 2010
May I have your attention please--it's Trash-picked Tuesday!
This is the first installment of Trash-picked Tuesday featuring an item trash-picked by someone other than me. You see, trash-picking apparently is an inherited trait. My brother Tom has gotten some great stuff over the years, and this is one. We'll feature some more of his finds in a few weeks.
This vintage microphone just has that old-school look about it. That's because that's where it came from: an old school that was going to be demolished. It was from the PA system in the principal's office.
This particular school yielded some other really cool things that just weren't practical to bring home, like a c.1930s autoclave. And wouldn't that have been handy when my kids were babies? All those drooly pacifiers and bottles left out in the car- presto!
But you have to draw the line somewhere. And someone has to be the line leader! Now, everybody line up for recess!
Monday, April 19, 2010
Living Vintage: Line Drying
To me, one of life's greatest pleasures is to climb into a bed of crisp cotton line-dryed sheets. There is nothing better than the scent of freshly washed and air-dryed laundry.
And the best part of it is that it's great for your clothes and great for the environment.
Our mothers and grandmothers knew this- everyone hung their wash out (or in, if the weather was bad) until the modern clothes dryer became popular in the 1950s.
I am nearly religious about hanging my laundry out. I grew up learning from my mom, who hung everything out, almost year-round (and we live in Pennsylvanina!). Over the years I picked up some pointers.
You need to start the process early in the morning. I like to get my first load in the washer by 7:30 (or even the night before so it's ready first thing). I usually have about 4 loads twice or 3 times a week.
The first load should be the heaviest fabrics. Jeans, work pants, comforters will need the longest line-drying time. It also helps in clothesline organization, which I'll touch on later.
Succeeding loads usually go from dark to light color. White fabrics, like T-shirts or sheets, are usually the lightest weight as well, so they go out last.
Try to get everything hung by 1 pm. Any later than that and you're risking evening dew settling in before the clothes are fully dry. I try to get everything down by 6 pm. On a "good drying day" with a bit of breeze and low humidity, light weight fabrics can take less than an hour to dry. Heavier ones might take 3-4 hours.
Turning jeans and cargo pants inside out, or pulling the pockets out can help those items dry quicker. Pants should be hung by the waistband so air can get inside the legs.
Always hang shirts, pilow cases, etc. from the open hem on the bottom. This is better for them structurally and will eliminate any marks from the clothespins up around the shoulder.
Know which way the wind is blowing. Facing the open end of shirts, pants, etc. into the wind will cause them to billow up with air and they will dry quicker.
For privacy's sake I do not hang underwear outside! I also don't hang out socks (they take up too many of my clothespins) or towels. These things can go in the dryer as a single load.
Clothesline organization is a big help when it comes time to take things down. When hanging clothes, I always hang the heavier fabrics closest to the support poles so the line doesn't sag so much. (If they come out first, this will happen naturally.) I then try to hang the clothes right-side out (except for jeans/pants with pockets) so I don't have to pull them apart later.
I also try to hang things in order based on which member of my family they belong to. Then when I take them down, everyone's pile is already sorted. Or if this is not practical, I kind of roam the clothesline to take down each person's stuff individually.
Some things can be folded right off the clothesline. Pants are easy to fold and put right in the basket. Sheets can be too, but this takes a little practice- you need to be able to pull them across the line in half and half again, then fold in halves before they hit the basket. T-shirts need to be taken inside to fold, so I do that later.
Now of course, you need a clothesline and clothespins. Fortunately my husband is handy enough that he made mine out of 4x4 pressure-treated posts. They are sunk about 2 feet down in a cement-filled hole. You need a sturdy clothesline or the posts can tilt toward each other from the weight of the wet clothes.
You also need clothespins. There are two basic types- one with springs and one without. They both have specific uses. The kind with the spring clip is good for clamping down on heavy and bulky things like jeans. The type without is better at holding thin fabrics like sheets and T-shirts in place. You don't want your sheets sliding down the line and getting all bunched up!
And finally you will need at least two clothesprops. These long pieces of wood (at least 8 feet) can prop up the line if it starts to sag in the middle. For long items like sheets, you definitely don't want them brushing along the ground.
And lastly, a word about Mother Nature. While line-drying is a fantastic way to take advantage of the sun and the wind, you are also vulnerable to birds and bugs. S**t happens. And when it does, I just take that item down and wash it again. No big deal. And bugs are bound to hitch a ride in on your fresh shirts from time to time, but unless you live in an area with a lot of ticks, they usually aren't anything to worry about.
So hopefully you live in an area that allows clotheslines- or if not, find out why!- and these tips will help you enjoy a simple pleasure from the past that makes environmental sense still.
Friday, April 16, 2010
Cooking vintage: Orange Marmalade
Lately I've had a craving for orange marmalade. And I happened to have about 8 oranges in my fridge that had to be used. Hmmmm, me thinks, maybe I could make some marmalade?
So I found a recipe in one of my vintage cookbooks, the American Woman's Cookbook, from 1947. This recipe does not technically require canning, but for safety's sake I planned to do so. Back in the 1930s when the book was written, the standard would have been to pack the marmalade in jars and then seal the tops with parafin wax and store in a cupboard. (As an aside, my mother, who was born in 1940, remembered that her mother used to wrap a thread around the top before sealing the jar with wax and leaving a bit hang free so it was easy to break the wax seal by pulling on the thread.)
To me, this seems like taking an unnecessary chance, so I planned to can it. This requires the extra step of sterilizing & sealing the jelly jars, so we will deviate a bit from the original recipe, FYI:
As you can see the recipe is very straightforward and requires only 4 ingrediants. It does, however take two days!
Whenever I start a canning project, I always read the recipe several times and make sure I have all the equipment and ingrediants close at hand. Timing and preparation are crucial when canning!!!!
I like to use vintage tools and techniques as much as possible. However I will not sacrifice cleanliness when canning (hence the modern cutting board and stainless pot, instead of the more traditional wood and enamel which could harbor bacteria). And I spent years working in professional kitchens, so a good knife is paramount. That is a Ludwig Schiff of Solingen 10" citrus knife with a serrated blade- not even my husband is allowed to touch that and he is a butcher! ;)
After washing and drying the oranges and two lemons, I cut the peel off and cut it into thin ribbons. Then you do the same with the insides of the fruit.
The little bowl in the center contains some sections of peel I cut into the shape of goldfish. I thought I'd try the author's tip: "For a pretty effect, remove most of the white from peel and cut remaining orange part into fish-shaped pieces."
The first step in cooking the marmalade is to take just the slivered peel sections, cover them with water and boil for 5 minutes. Drain and repeat twice. (I believe this step is to remove the bitterness from the peel.)
Then add the pulp section slivers to the drained peel slivers and cover with 3 times as much water. I needed a large stockpot for this. Then you let the whole thing stand over night. Again, I believe this is to remove bitterness, but I'm not sure. I just did as they said!
Day 2: Fire up the stove again, this will take about 4-5 hours. I also filled the water bath canner and got that going- that itself will take over an hour just to heat up.
As directed, "Cook the orange slivers for about 40 minutes, weigh and add an equal amount of sugar."
I took this literally, and maybe that was not the intent of the author. If you weigh the contents of about 6 qts of water (1 gal weighs about 8 pounds) you would need 10-12 pounds of sugar. Perhaps they were assuming less water from the start, or that more would cook off during those 40 mins? Based what I thought would be a more appropriate amount of sugar, I added about 2-3 pounds. And to me the end result is a little sweet, so next time I might add even less. But you still need plenty of sugar to make the "jelly test":
When the syrup coats the back of a spoon without dripping, you have passed the jelly test!
And you can see that the mixture has cooked down quite a bit and darkened in color. At this point I threw in a small handful of whole cloves and allspice for a spicy twist, reminiscent of Constant Comment tea. I let it cook down a little bit more while I readied the jars.
You need about a dozen clean 6 oz jelly jars, or 6-8 larger jars, bands and new lids. Plus a cup of hot water to moisten the lids, a clean damp cloth, a funnel, ladle to fill the jars, and a jar lifter (the tongs with the green rubber ends) to lift the jars in and out of the water bath. Once I'm almost ready to start filling the jars, I put the clean jars in the boiling water bath. This sterilizes them and heats them to the same temp as the hot marmalade I'm about to spoon into them.
Fill the hot jars with the hot product using a clean ladle and canning funnel (wide mouth). This funnel is designed to keep the product from getting on the edge of the jars. You need to wipe the edges clean with a cloth before setting the warmed lids and bands on top. If there is any jelly on the edge it will not seal properly.
Place the jars in the boiling water canner and boil for 5-10 minutes. You can see the air bubbles escaping from beneath the lids- a good thing, as canning creates a vacuum. As I mentioned above, canning is really an "extra" step- the marmalade would probably be shelf-stable for a few weeks, anyway- but I'm not willing to take that chance. Even this relatively short processing time is plenty to insure safety.
The finished product! I think the time it took to add the little orange peel goldfish was a really cute addition and everyone seems to love it. I ended up with a lot of marmalade! The large jar is a whole pint, plus about 8 smaller jars.
When I hit 25 followers, I will include that small jar above in a giveaway, so spread the word!
Also, Mick at Everyone Goes to Mick's has a cool travel-themed giveaway, so check it out!
Did you get your taxes done in time?
Here at the PIT, we strive to be unique- I bet you could search blogger all day and not find this: a 1040 from 1939. Yep, this is the whole form. One page, front and back. No Schedule D or K or UE, or even a W-2. Heck there isn't even a Social Security # on it.
Having just spent a solid week on preparing my federal, state and local returns, the simplicity of this form is breathtaking. The good old days indeed!
Thursday, April 15, 2010
Thrifted Thursday- lawn chairs, pt. 2
As promised, it's Old-school Glider day on Thrifted Thursday! (I know the suspense has been awful, just awful...)
I have wanted a porch glider since I was about six. Years ago, we used to visit an old Great Aunt in Lititz, PA (a great "vintage" town) who had one in her basement. My brother and I would ride on it the whole time (I guess there wasn't much else to do, LOL) while my parents and grandparents visited upstairs.
Ever since, there have been very few vintage items I wanted so badly, yet have been unable to obtain. So imagine my surprise when I stopped into one of my very favorite thrift stores last December and found one! Now, this wasn't a two or three-seat loveseat style glider, but a single chair glider. I don't think I have ever seen one of these anywhere else.
So for $17, I bought it and cajoled my dad to come up with a truck and take it home for me. It was my Christmas present to myself. I couldn't wait for warm weather to arrive so I could sand and paint it and set it up.
As you can see, it's not the more familiar "punched" design with a solid seat and back (see vintageglider.com for more examples) but a kind designed for a cushion. I think it's probably older than the punched style, maybe 1930s? Everything is welded and riveted and it is really heavy, but it sure does glide easy.
I decided to paint it a 2-tone green. The light green you see in the photo was about the third color it had been painted. I found layers of brick red and ivory underneath. I liked the light green, but it really needed to be painted just to cover all the chips in the paint to prevent rust from forming. There was no rust on it anywhere- my guess is that it led a very sheltered life!
I have a couple springer motel chairs that I have painted a dark green with Rustoleum textured paint. This paint gives a matte finish with a bit of texture like a very fine sand paper. It really wears well outside and hides any flaws, like dents very well.
I thought I would paint the top part (the part that moves on the glider frame) the same dark green and keep the lower part light green.
I found a green and white cushion with a kind of retro feel and the project is complete!
Now all I need is a table to set my drink on...
Wednesday, April 14, 2010
Cool family photo
In the aftermath of my father-in-law's passing, we've been going through a lot of stuff and came across a ton of photos. This one is my hands-down favorite!
It's my husband's grandmother (my FIL's mother) standing outside a Florida motel in the late 50s/early 60s. I just love the neon sign behind her. And those shoes and that bag! Awesome!
It's my husband's grandmother (my FIL's mother) standing outside a Florida motel in the late 50s/early 60s. I just love the neon sign behind her. And those shoes and that bag! Awesome!
Tuesday, April 13, 2010
Trash-picked Tuesday: vanity mirror
On this issue of Trash-picked Tuesday, we have a lovely vintage vanity mirror. I'm sure it went with a 1930s/40s women's vanity, but all that was left by the time I got there was the mirror. As a matter of fact, I can't believe the mirror was still intact at all; I found it leaning up against one of those giant "Donate your used Clothing" bins in a parking lot. (Don't you ever wonder what treasures people might have put in those things?- I'm sure plenty of vintage clothing gets discarded there and eventually ends up made into rags overseas.)
As you can see it was in fine shape, and has a lovely etched vine pattern around the top. Now, I already have a very cool art deco vanity and bedroom set so I don't need a mirror for that (that'll be a feature post sometime down the road), so I stuck it on top of a couple old suitcases in a corner. It's a handy spot to grab a quick once-over before I walk out the door.
Friday, April 9, 2010
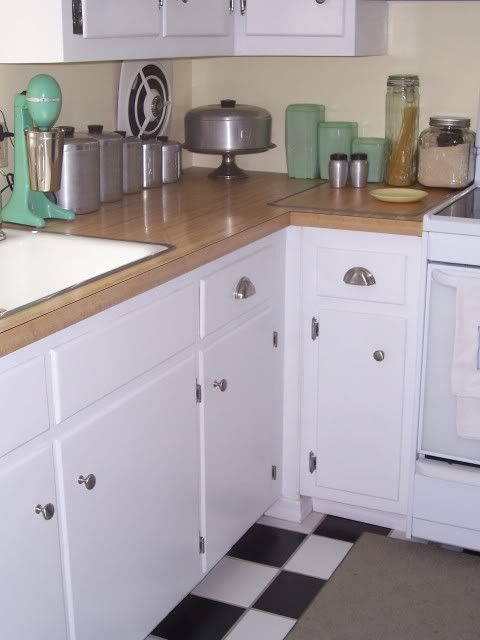
A peek inside Chez QT, pt. 2: My vintage kitchen
Zootsuitmama put out the word to show off your vintage kitchen. And the kitchen just happens to be my favorite room in the house!
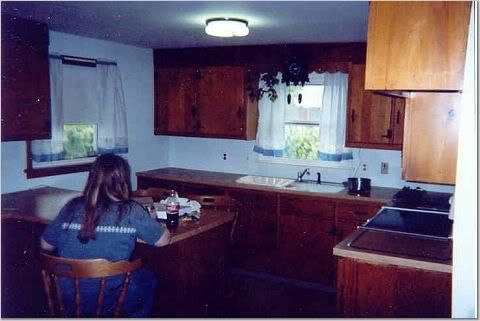
First, the "before" shot- a dark, dingy, but completely original 1960 kitchen:
First, the "before" shot- a dark, dingy, but completely original 1960 kitchen:
(That's me eating at the breakfast bar on our first day in the house.)
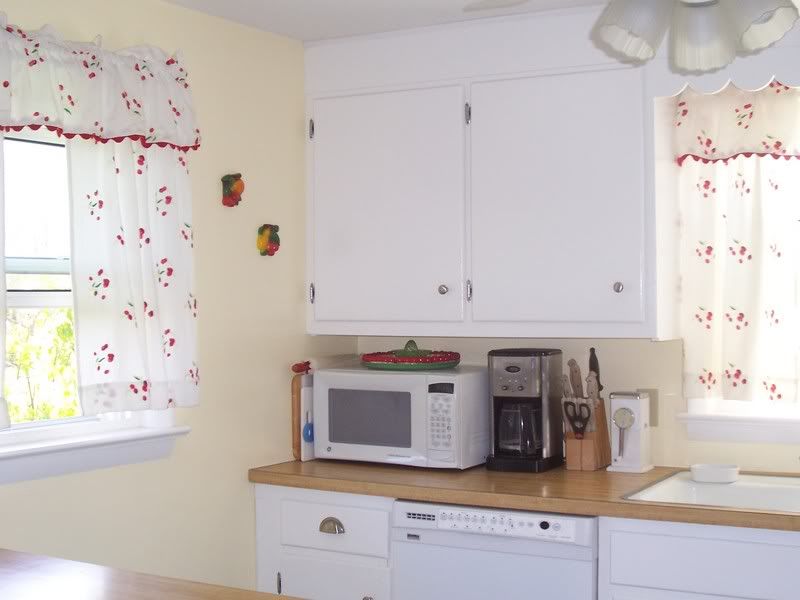
We decided to paint the cabinets white and the walls a butter yellow. The floor of the work area is B&W ceramic tile and carpet in the dining area. Someday my plan is to get new black slate countertops, but for now we still have the old faux-butcher block laminate. After about 6 gallons of paint and three solid weeks of prep (this is all before kids, thank goodness) to remove about half the cabinets entirely and strip the rest:
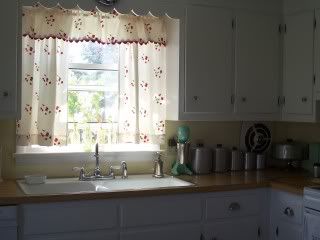
I love this sink. It is gigantic- about 4 feet long; a true "double" sink. However, if we get new 'tops I'll probably have to get a new one, and they don't make 'em as big anymore.
Here you can see the floor- my husband laid the tile himself. Unfortunately, we don't have a vintage range, but that's on my list of things to find.
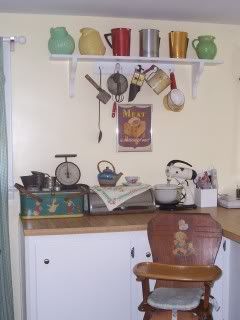
This area used to have a set of upper cabinets, but we took them down- there really was such a thing as too many cabinets in this kitchen! You can also see the 1940s vintage high chair we used for both kids.
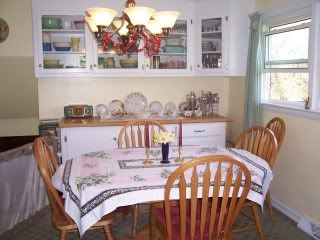
Dining area- the area under the window also had cabinets, but took up too much of the dining space:
Some close-ups of the "goodies". The glass-front cabinets are original:
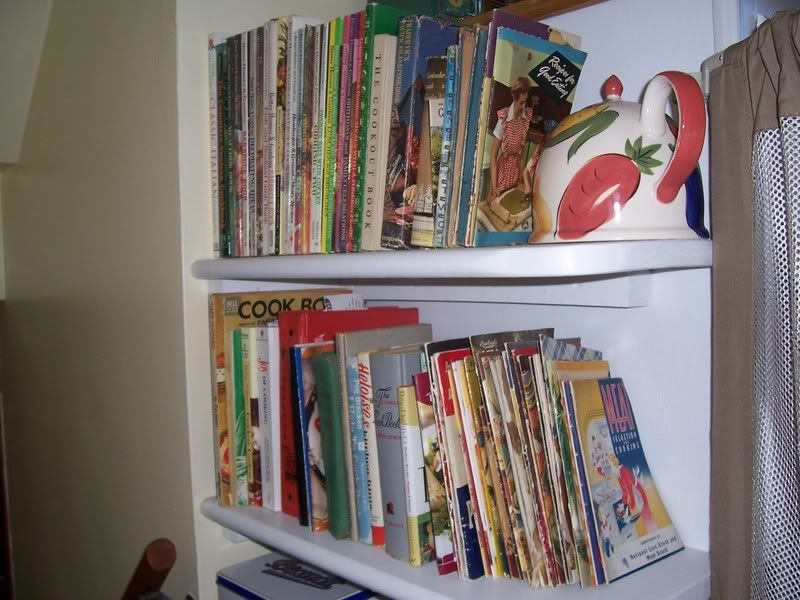
My cookbooks!
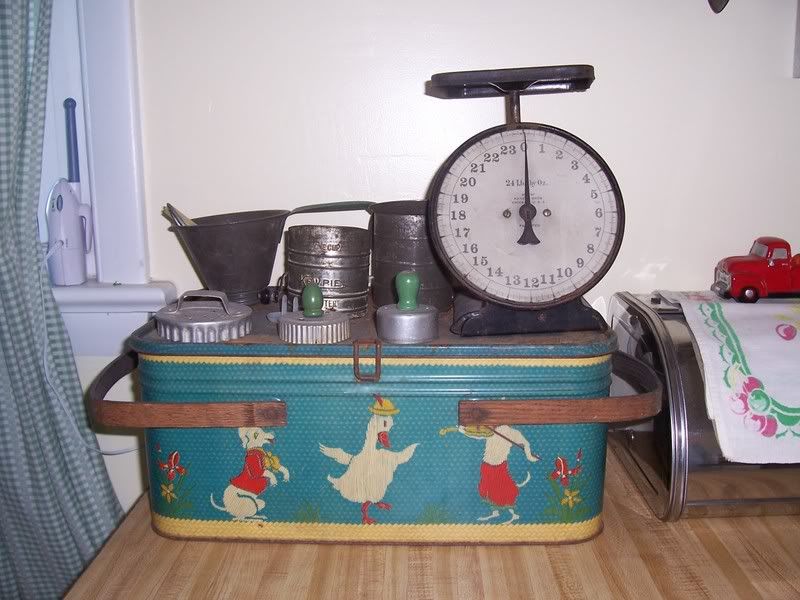
This little metal picnic hamper inspired the color palette for the whole kitchen- soft yellow, jadeite green and Cherokee red:
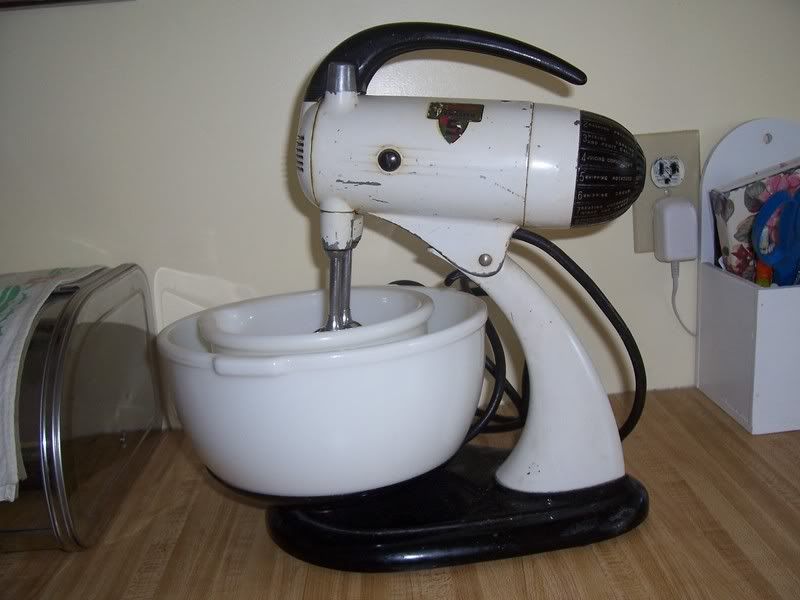
Finally, my 1940s Mixmaster, which I use almost daily- read more about it here:
Hope you all enjoyed that- thanks for the suggestion, zootsuitmama!
Subscribe to:
Comments (Atom)


