Showing posts with label recipes. Show all posts

Tuesday, May 1, 2012

Make it from Scratch Monday: Homemade Butter


Ever wanted to try making your own butter? I did and now I can say that it is so easy anyone can do it.


Just buy a pint of heavy cream, and pour it into a clean mason jar with a lid. Shake it until it becomes whipped cream. (Take some of that out and eat it with fresh strawberries- yum!) Keep shaking and eventually it will separate into a ball of yellow butter and a milky liquid- buttermilk. Drain off the buttermilk to use in your pancakes and rinse the butterball under fresh cold water until it runs clear. Mix in a tiny bit of salt or some herbs and roasted garlic if you desire. 

Eat some immediately (with homemade English Muffins) and save the rest in a 501 Fridgie (Butterprint, of course!)


For more information, head over to my other blog about self-sufficiency and Depression-era living: http://the1930sproject.wordpress.com/2012/04/26/how-to-be-a-butter-and-egg-man/

Monday, March 5, 2012

Make it from scratch Monday: Sourdough Starter

I have to say, this is one of my more unusual recipes! And it's one of my prouder moments as a from-scratch cook. (Haha, apparently, it doesn't take much! :P )

But in my continuing quest to be more self-reliant and self sufficient I really wanted to try starting sourdough. I have been baking my own bread now for a while and one thing I can't do without is yeast. Sure, I can go to the grocery store and buy a jar of it, but what if I couldn't do that? Like a good Depression-era housewife, I need to be prepared for the possibility that I can't just go to the store and buy something. And jar yeast is something that has an expiration date; you can't buy it in bulk and store it very well.

So I decided I wanted to get some sourdough starter and give it a go. I don't know anyone nearby that had some started that they could give me, so I turned to the internet. Of course, there are lots of places that want to sell you some starter, but, cheapskate that I am, I'd rather find it for free. There are also ways to gather wild yeast from the air, but that can be hit-or-miss.

Sourdough bread is also one of those iconic foodstuffs of the American West, and since I love history I found the perfect match- a free starter kept from an 150-year old yeast that traveled the Oregon Trail (bonus points for anyone that remembers that game from elementary school!). It's available here: http://carlsfriends.net/ . All you need to do is send them a self-addressed stamped envelope and they send you about a tsp. of dried sourdough starter.

It took me about 2-3 weeks to get mine and of course I started it right away. But it was a good thing I only used half of it, because the first try didn't start. I think I must've used too hot water and burned it, or it was too cold and things never really got to fermenting. But the second time turned out to be the charm, and I have a lovely quart jar of sourdough yeast bubbling away on my countertop right now.


It even smells like sourdough! I can't wait until this weekend when I make sourdough hotcakes and biscuits!

Friday, August 26, 2011

Up to my eyeballs!

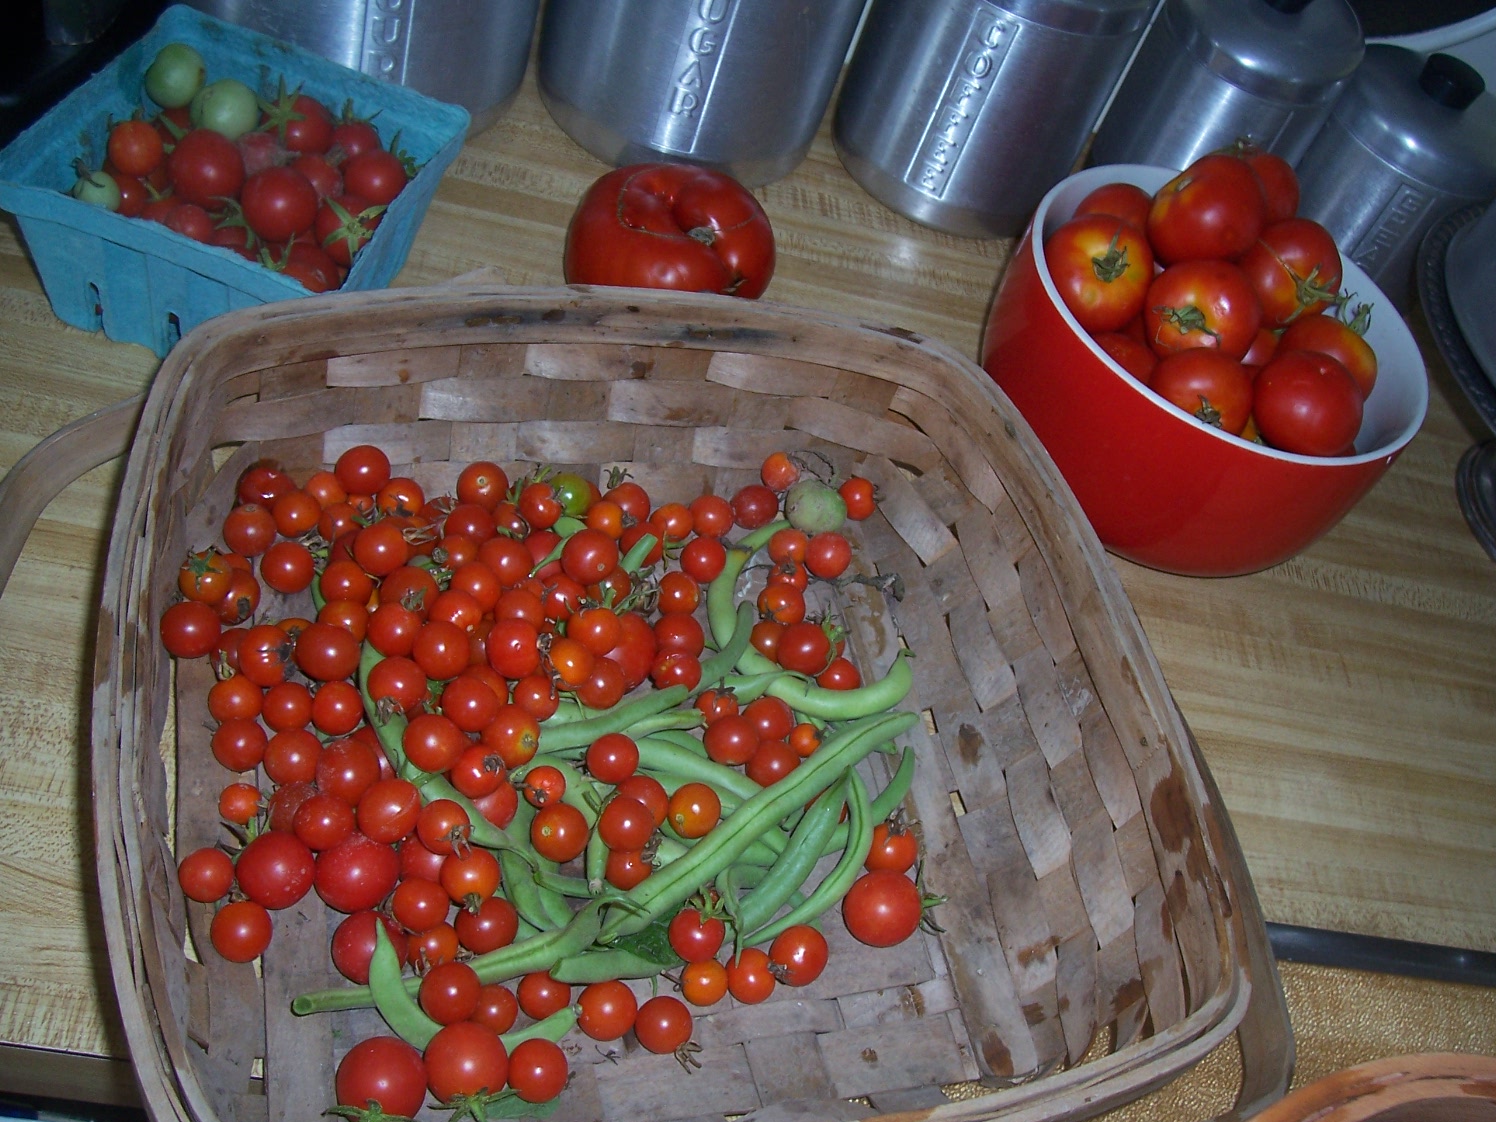
This is one of my favorite times of the year: canning season! The peppers, tomatoes and fruit are rolling in and it's time to get them put up for the cold months.


This is one day's bounty- and my sinks are true double sinks- 24 in square each. That is over 7 pounds of hot peppers, with a couple bell peppers mixed in.


We've had a lot of cherry tomatoes this year. While I love eating them, I don't can them. If I do anything, I'll dehydrate them and store them dried.


All those peppers! I only canned half of them and got all these jars of hot pepper relish. The other half went into the freezer. Peppers freeze really well- just cut them to the size you would normally use them fresh and put in a plastic bag. For bell peppers, I cut them into finger-length strips; the hots just get the tops trimmed off.
There are 3.5 quarts of crushed tomatoes there as well.


I had 12 pounds of peaches, so I made this peach jam (minus the cinnamon and added 2 T of vanilla extract). It was so good we ate almost a whole jar before it even got cool. Would be a great ice cream topping as well! I'm also quite pleased that all my jars sealed this week; I had been having some problems with sealing earlier in the year. I think it might have been a bad batch of lids.
 

I think there will be more tomato canning this week, but that's probably about it for now!

Monday, May 23, 2011

Make it from Scratch Monday: Rhubarb Cake

If you love cooking seasonally, you're probably aware that rhubarb is one of the first spring vegetables. And if you happen to have an established rhubarb plant in your yard you've probably got more than you know what to do with right now! (If you don't, go out and plant one right now; you can buy rootstock at any garden center and it will be ready to pick in about 2-3 years.) And BTW- it freezes really well; just chop the stalks and freeze them in ziploc bags until you're out of the fresh variety.

Here's a dessert recipe that's a little different than your standard pie or compote recipe: an easy from-scratch cake with a runny rhubarb filling on the bottom. It is so good, you'll just keep making it until all the rhubarb is done!

This is a two-part recipe; prepare the "bottom" and the "cake" separately. Take a stick of butter out of the fridge about an hour before starting so it has a chance to get soft. It's also important to use a large non-reactive pan for this recipe. A 13x9 is the smallest you could use, and glass or a vintage enamel-ware pan like mine are the best. A steel sheet pan tends to leave a metallic taste when combined with the rhubarb. Sometimes, if I am using a very large pan I double the batter part and leave the bottom part as-is.

Those of you who have been following my blog for a while may also note that this is one of those recipes where I can use almost exclusively vintage kitchen items to make it- Vintage Recipes with Vintage Techniques! The only modern thing I always use is a dishwasher-safe cutting board and good knives.

Rhubarb Cake

Ingrediants:

Bottom:
4 c. chopped rhubarb (1/2" to 1" pieces)
1 1/2 c. sugar
2 Tbsp flour
1 egg
2 Tbsp. melted butter
pinch salt

Cake Batter:
1 c. sugar
1/4 c. softened butter
1/2 c. milk
1 1/2 c. flour
2 tsp. baking powder
1 egg

1. Mix the dry ingrediants for the bottom (flour, sugar, salt). Add the melted butter and then the lightly beaten egg.


2. Chop rhubarb in 1/2 to 1 inch chunks. If you're using frozen rhubarb add it while it is still partially frozen, and include any liquid that may have thawed out in the bag, or your rhubarb will get "chewy".


 3. Combine rhubarb and bottom ingrediants. Grease a non-reactive (not steel) 9x13 pan with butter or cooking spray.

 4. Add the combined "bottom" ingredients to your pan. Preheat your oven to 350.


5) Make the "batter" by creaming the butter and sugar. Then add the egg.


6) Add the flour and baking powder and mix.


7) Add 1/2 c. milk.


8) Mix well. Batter should be a little sticky but not very heavy.


9) Spread batter over bottom mixture. If you are using a pan larger than a 9x13 it probably won't cover completely. That's OK, it will spread out and the bottom part will bubble up over top- yummy!


10) Bake at 350 for about an hour. Mine got a little darker than I intended because I got distracted, but it really carmelizes great this way. The top gets a little bit crusty and the bottom is so gooey!


11) Enjoy while it's still warm! :)

Monday, April 18, 2011

Make-it-from-scratch Monday: Trout en papillote and homemade tartar sauce

I mentioned before that one of my favorite pastimes is fishing. Well, trout season opened here about 3 weeks ago and we have been eating a lot of it! Between the four of us (yes, Kate fishes too, and sometimes lands one :) we probably catch over 200 fish in a season. We eat plenty while they're fresh, and give a lot away, but freeze a bunch every year. Sometimes we fillet them if they're really big (18" +), but we usually clean them and freeze them whole. Then I have them all year long.

We usually catch rainbow trout, but on occaision catch a brook trout or two. The rainbows are much bigger, usually 12-17 inches. If we catch a brookie, they are usually dinner that night. Their flavor is much milder and doesn't hold up well to freezing. I usually pan fry those with the skin on. These are not wild fish; there are a few native trout streams in PA, but none nearby that have fish big enough to keep (7 in +). We catch them from stocked streams and lakes; some of the lake fish have been in there for years and have pink flesh like salmon (a close relative to trout) from eating a diet of insects.

I make the whole fish en papillote ("in a package"- i.e. wrapped in foil), with the cavity stuffed with seasonings, in the oven during the winter, but during the summer we do them on the grill. This is a good way to use up any of those exotic condiments you have lingering in the fridge. I made my fish this time with Oyster Sauce; in the past I've used sriracha sauce, cajun seasoning, or a bunch of fresh herbs from the garden. Chives and basil are particularly nice- the "stuffing" just contributes a little bit of flavor and aroma since you don't eat that part (though you could). You can customize each person's fish to their taste- make one with hot sauce and cajun seasoning and one with just onions and Old Bay.

You could also do this with firm filets of fish, like salmon or catfish. I would avoid using something that flakes easily (cod) or is too strong a flavor (like bluefish).


Ingredients:

2 whole trout, cleaned and heads removed
1 onion roughly chopped or 2 ribs of celery
Old Bay seasoning
herbs and/or condiments of your choosing

1) Rinse and dry the fish.
2) Roughly chop the onion or celery

3) Prepare the aluminum foil sheets- allow plenty of space to wrap the fish loosely in packets. I usually sprinkle a bit of Old Bay on the foil first to coat the outside of the fish.


4) Place the fish on the foil and season the cavity with Old Bay or whatever else you feel like using. Stuff with the chopped onions, celery or fresh herbs.

5) Wrap the fish in the foil to make a package, and poke a few vent holes in the top with a knife.

6) Bake in a 450 degree oven for 20-30 mins. Fish will be opaque white and flake easily when done.

Meanwhile, make the tartar sauce. This is so quick and easy you will never buy it at the store again.


Combine 1/2 c mayonnaise and about 2-3 tbsps sweet pickle relish. (I'm using homemade pepper-onion relish- it has a couple whole peppercorns and cardamom seeds in it. It's really good; maybe this fall I'd share that recipe!)


Add a dash of lemon juice and about 1/2 tsp worchestershire sauce. Stir to combine. Refrigerate the unused portion and it will keep for weeks. (It tastes better in a Pyrex fridgie too! :)


Monday, March 7, 2011

Make-it-from-scratch Monday: A Little Help from our Friends

Hi all! This week's MIFSM is a little bit of a departure from our "home cooked" theme. In fact, it's probably the complete opposite, but hey, I'm not a stickler for rules around here anyway.

I know most of you are into eating better (that's why you're here on Mondays, right :) and what could be better for you than minimally processed raw foods? Better yet, what if those foods were chips? Vegan, raw, locally sourced, sustainable chips?

No way!

Yes Way! (OK, my 4th grade self got in the way there, but I am so stoked about these things!)

You all know by now that here at Chez QT we eat as much home-grown or locally sourced vegetables as possible. And we hunt and fish for our meat. We are not vegetarian, vegan or raw (though I do enjoy me some sushi) by any menas, but I would describe our eating philosophy as "whole foods" and sustainable. Of paramount imnportance to our family is knowing where our food comes from.


We eat very little processed food, and one thing we cannot do ourselves is make a good tasting, healthy snack chip (though I have a pretzel recipe I'm dying to try). The option for us is to eat crappy Frito-Lay products and feel really yucky afterwards or go without. And homemade granola bars only go so far (that's an upcoming Monday post.)

So I was delighted to learn from a friend about Brad's Raw Chips, a start-up operation just a few miles away from home base here at the PIT.  And they were gracious enough to send me a sample of their products to review. (Obligatory disclaimer: I was in no way compensated for this review- except for some delicious free snacks, LOL- and my opinion is strictly my own!)

Brad's Raw Chips are the product of one man's (that would be "Brad's") quest to develop a truly raw chip to fit into his raw diet. All the products are vegan, gluten free and truly raw- dehydrated to become crunchy, not fried or baked. And while you and I may not be on a raw diet, we can still enjoy the benefits of eating healthy with this tasty chip.

I sampled two different types of snacks- two kinds of dried leafy kale, and two kinds of more traditional "chips".


 The dried leafy kale came with vegan raw cheese (which is made from a blend of spices, raw nuts and nutritional yeast) in the "Naked" form, and added garlic in the "Vampire Killer" variety.


It is melt-in-your-mouth tasty, with a very light nutty crunch, lighter than popcorn. The "cheese" is very good- I don't know how they do it, but it really does taste like cheese! Before I knew it, I had eaten half the carton.

It's important to note that while the product is much healthier than your average potato chip, there is a large proportion of cashews in the "cheese" and it does add up in calories eventually. But the nuts do add a lot of protein (6 grams per serving!) to the snack, and that is definitely a good thing. They are also incredibly high in vitamins A and C- over 100% per serving.


And best of all, it looks like leafy, green kale- no mystery about what it is!


As you can see in the package above, since the kale is so delicate it tends to disintegrate a bit. If you're creative like me, this can be a plus. I mixed the remaining kale bits into some plain yogurt (sour cream would also work) for a great-tasting dip. They would also be great stirred into mashed potatoes (not raw, I know...) or as a topping for steamed broccoli or cauliflower. In fact, maybe Brad's could market them this way, like a Hidden Valley Ranch-type dip packet.

The other products were more traditional "chips" made from whole vegetables and seeds with a dash of olive oil and salt. Again, they are dehydrated, not baked, so all the ingrediants are still totally "raw". I tried the Red Bell Pepper and Sun Dried Tomato varieties. They had the texture of Sun Chips, but all the flavor of the vegetables they are made from. The Red Bell Pepper was my favorite- it had the sweetness of a ripe bell pepper with a bit of nutty crunch from the flax seeds you can see ground into the chip.

The tomato variety really reminded me of sun-dried tomatoes, but in a crunchy chip. I could totally see myself serving this at a party with some homemade salsa or guacamole, or with a yogurt dip made with the kale bits!


The texture is light and crunchy and not at all greasy, heavy or salty.


One of the best aspects of the company, and one that we here at the PIT share, is that Brad's Raw Chips supports local farmers by buying their produce nearby when in season. And all the waste product is composted and returned to the fields, just like it is here at Chez QT.

Brad's Raw Chips are available mostly on the East Coast, in Wegmans and Whole Foods markets. But you can buy them online at http://www.bradsrawchips.com/collections/all . And if you follow them on facebook, and subscribe to their newsletter, you are entered their giveaway to win three free bags: http://www.facebook.com/?tid=1425698061342&sk=messages#!/bradsrawchips?sk=app_7146470109

Hey Mikey, you'll like them!

Monday, February 14, 2011

Make-it-from-scratch Monday: Hunter-style rabbit

In honor of Valentine's Day, show the man in your life how to cook the game he bags (or buys, in this modern age!)

This is another of my favorite wild game recipes. You can find domestic rabbit at specialty supermarkets or, better yet, your neighborhood butcher shop, or you can use chicken thighs in this recipe. For the vegetarians, you could certainly use eggplant or white beans; but the cooking time would be much less! I used a dutch oven and cooked it on the stove, but you could also use a slow cooker- just brown the veggies and meat first and then add everything to the slow cooker for 4-6 hours.

Ingredients:

1 whole rabbit, cut-up, or 2-3 pounds skinless chicken thighs
1/4 pound diced ham or uncooked bacon
2 cloves garlic, sliced
1 large or 2 medium onions, chopped medium
1/2 c. celery, chopped
8 oz whole baby carrots or 1 c. sliced carrots
1 28 oz can diced tomatoes
1 c. good red wine
herbs, such as parsley, rosemary, oregano and thyme, about 2 Tbs total
salt and pepper to taste

Pre-heat dutch oven, large saucepan or skillet on stovetop.
Add cubed ham or bacon and cook until it becomes browned.
Add rabbit or chicken pieces and brown on all sides. You may need to add a little olive oil if the ham/bacon is very lean.


Add garlic, onions, celery and carrots and cook until translucent.


Add the tomatoes and the wine- I used 2 pints of my home-canned crushed tomatoes, but a 28-oz can of store-bought is fine. Just make sure you taste before adding any additional salt later!


At this point, you can transfer to a slow cooker for 4-6 hours, or you can continue to simmer it, covered, on the stovetop for about 2 hours. When meat is tender and falling off the bone, remove it to a dish and separate it from the bones. Return the meat to the veggie mixture in the pot.


Heat through, and add herb mixture, salt and pepper to taste.
Serve with wide noodles, rotini or penne.